

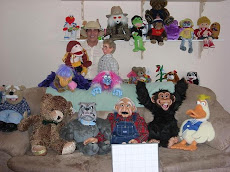
Everyone has at some point in their life built a puppet whether it was of foam or cloth while you were in elementary school, you must have done some thing.. Well lets go back to the basics and do it again... We will go to the next step at a futher date, I would appreciate some imput and or what you have built and how you did it.
What you'll need:
12 inch square of foam rubber, one-quarter-inch to one-half-inch' thick Scraps of felt, fabric, yarn, colored paper, buttons Stapler Rubber cement
Background:
Kids can go wild with their characterization of this puppet. The face and mouth can be very expressive. Experiment with the variety of movements that thumb and fingers can make.
Setting up:
Staple two sides of the foam rubber together to form a tube. This is your first test, if you were to make it for a child us glue, remember when gluing to fold the glue sides inside. Form the puppet's face by putting one hand in the tube and tucking the edges in to make a wide cuff. Thumb and fingers should be inside the cuff.
Bend wrist forward to form the head. Continue to shape the foam until satisfied with the look of the face.
Construct and glue on the facial features one by one, putting the puppet on the hand to guide each feature's placement.
Bend wrist forward to form the head. Continue to shape the foam until satisfied with the look of the face.
Construct and glue on the facial features one by one, putting the puppet on the hand to guide each feature's placement.
Remember I said these were the basics...got any better ideas lets hear from you about them.
THIS INFORMATION WAS GOTTEN FROM VARIOUS SOURCES WITH SOME OF MY EXPERIENCES INCLUDED.
Reading is the key to most new experiences, so my frioends read, learn the craft, what I am attempting here is to open a door just enough to let you peek in, but you need to, get completely inside stroll around and get aquainted. Read up on everything you can get your hands on pertaining to puppet making, so you get the inside dope on the workings of that puppet. If you need to become aquainted with the world of puppets go to The puppeteers united Blog, which has one of the most extensive lists of puppet links available. Get a good glue gun and some sewing basic skills. Cut out the shapes and patterns on a posterboard. When you get your pattern, you should adhere it to some poster board and cut out the individual shapes. First cut the rough shape of the piece and then tack it down. Use double sided tape to hold your patterns in place. What takes up the most time is cutting the patters and material.
When you first begin go the cheap way out and buy your foam and fleese from a fabric store. Again - READ - and remember the terms 'Reticulated Foam' and Antron Fleece. here is a surprise for you, the head is just one piece of foam. Some suggest a firm material such as cardboard or foam, it helps hold the shape of the head, for the core for the mouth plate. The pattern is also made so that you can improvise. When forming the head you will make it with the hole for the hand to enter throught the neck. Make sure you make the hole big enough for your hand to slide in ansd out without any problem. I also like the method of joining the back/ inside of the mouth plates with one piece of fabric. The mouth is lined in front with black felt and ready for the next step.
Each part of the body has a seperate pattern, such as arm, hand, tongue. Your puppet can be made of fleece or foam your choice. You can make one hand arm pattern as well. You need to fill the hand and arm use a poly-fil. Make sure to make a joint at each area a joint is required, elbo, wrist, knee, ankle, What to use to form the rotary, a half or 3/4 of a ball the size of a ping pong might work for you. Lets make a face cut the pattern for the nose, eyes, eye lids ears mouth, lips, remember to use the hair wig line for the ears, and eyes positioning.
Each part of the body has a seperate pattern, such as arm, hand, tongue. Your puppet can be made of fleece or foam your choice. You can make one hand arm pattern as well. You need to fill the hand and arm use a poly-fil. Make sure to make a joint at each area a joint is required, elbo, wrist, knee, ankle, What to use to form the rotary, a half or 3/4 of a ball the size of a ping pong might work for you. Lets make a face cut the pattern for the nose, eyes, eye lids ears mouth, lips, remember to use the hair wig line for the ears, and eyes positioning.
Be sure to give your puppet big eyes use a ping pong ball cut in half, and artistically color in the center of the eye in the color you desire. Be sure that each step you add to the finished product gets photographed, the reason for this is so that in the future you have a photographic record of your progress, also write down each step of your progress. You might want to place the parts in there desired location befor gluing them in place to see what it looks like. If you desire eyebrows cut a small piece from the wig, or a goatee as well, or mustache, you choose. When placing the red tongue, the roof should have a small black piece towards back to give impression of throat.


No comments:
Post a Comment